Make Math Fun with a Math Selfie

A math selfie can help improve problem solving skills, increase self-confidence, and showcase student work while learning math.
Whether showing a quizzical look or a wide-eyed, cheerful smile, selfies are a mainstay among today’s youth. Selfies (short for self-portraits), serve as a way for pre-teens and teens to express their mood and share important experiences. As technology continues to become more prevalent in daily life, selfies provide a way for young people to participate and affiliate with that world. Although taking selfies is a part of “growing up digital”, it does not mean that all self-portraits are acceptable. As parents, we need to help our students learn the limits and guidelines for the type of pictures that are appropriate and those that are not. By applying an academic lens to selfies, we can help our students engage in the selfie trend in a positive way. The best part is that it can be applied to just about any math problem!
Math Selfie: Part One
Begin with a word problem. Perhaps your student has learned how to calculate the circumference of a circle and is completing practice problems to work toward mastery of the concept. Let’s see how the math selfie could be applied to a practice problem from this lesson.
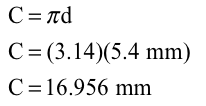
Sample Problem: A machinist made a metal rod with a diameter of 5.4 millimeters. What was the approximate circumference of the end of the rod?
First, have your student read through the problem. Next, introduce the interactive mnemonic device, SELFIE, to help your student work through the problem solving process.
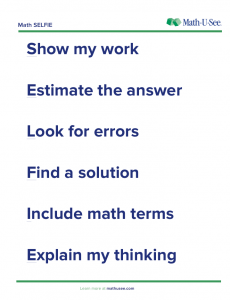
#SELFIE
Show my work
Estimate the answer
Look for errors
Find a solution
Include math terms
Explain my thinking
Show my work: Create a visual representation. He may decide to build a model, draw a diagram, act the problem out, or record a list of information needed to solve the problem. One or more of these strategies may be used, or he might come up with his own unique way to show it.
Estimate the answer: Determine a reasonable range for the solution. She might say that 3.14 rounds to 3 and that 5.4 rounds to 5. Since 3 x 5 = 15, a reasonable final answer will be around 15 mm. She might also indicate that 3.14 is already an approximation; therefore, the final solution will be as well.
Look for errors: Encourage him to check his work. This may include reading through his computation, using a calculator, or having a sibling or peer review what he has done.
Find a solution: Perform the actual computation. Look to see that she substitutes values correctly in the formula, that her work is accurate, and the answer is labeled with a unit of measure. Refer to the example below.
Keep in mind that, for other types of problems, this step might include creating a chart, table, or graph; showing a pattern; forming a conclusion; or making a prediction.
Include math terms: Listen for accurate use of math terms as your student teaches you how he solved the problem. For instance, does he refer to 3.14 as pi? Did he use the term diameter instead of saying “the line drawn from the center of the circle”?
Explain my thinking: Allow your student to reflect on the accuracy of her answer and prove that her method for solving the problem works. For the circumference problem, she might share his computation, talk about the strategy she used, or describe what she understands conceptually about circumference. If your student has trouble getting started in this process, you can help her by asking open-ended questions such as “What made you decide to do it this way?”, “What questions arose as you worked?”, or “How would you rate your solution?” If your student is ready to extend her thinking, you might ask questions like “How could you solve the problem if you were given the radius instead of the diameter?” or “What other math concept can you connect with this?”
Note: You may choose to have your student complete one or several problems using the SELFIE mnemonic before moving on to part two.
Math Selfie: Part Two
Once the problem solving is completed and all work has been checked for accuracy, your student is ready to snap a real selfie! Using a smartphone, tablet, or webcam, your student can take a self-portrait showcasing his problem solving skills while being creative. Maybe, for the sample problem given, he will choose to include circular objects he finds around the house or include a copy of his written work in his self-portrait. Free photo editing apps such as Pic Collage or Photo Grid allow your student to create an instant collage of his work and add digital stickers, borders, or text. He can share his accomplishment with your family digitally or print out a copy.
Printable Math Selfie Chart
Click here to download a printable math selfie chart.
So the next time your student grumbles about word problems, try refreshing your math routine with a math selfie. The interactive mnemonic helps your student to build responsibility for making sense of mathematics, use precise vocabulary, receive feedback, and reflect upon on the problem solving process. It also helps you as a parent learn more about your student’s level of understanding and identify what your student needs next. By capturing and celebrating his work with a selfie or photo collage demonstrates how your student can participate in the selfie trend in a fun, positive, and safe way.